Welcome to your new openELISPOT! 🎉
We are glad to have you on board! Thank you for volunteering your time to test the openELISPOT. Your feedback will directly shape the future of this open-source platform, helping us refine performance, usability, and reliability. In return, we hope the openELISPOT becomes a powerful tool in your research to enable faster, more accessible ELISpot analysis for your laboratory.
Package Contents
- Pre-assembled openELISPOT
- Motion system
- Main unit
- Software preloaded onto a MicroSD card installed in the Raspberry Pi 5
- Logitech wireless keyboard and trackpad (Requires 2X AA batteries, not included)
- Hex key set
- AC Adapter and UK power cord
- You may use a travel adapter, or your own IEC “kettle lead” cable
- Spare 3D-printed idler_assembly
- Although we haven’t had a problem ourselves, the idler assembly is under constant tension so we have included a replacement just in case
- QR code for accessing the openELISPOT via WiFi
Unpacking
- Remove the contents from the shipping box
- Carefully remove styrofoam support material from the unit
- Remove all tape and packing material from the unit. Ensure that no tape residue is left on the linear rails.
- Place the unit on a flat surface, away from direct sunlight
Assembly
Your openELISPOT unit has been preassembled, but for shipping, the main unit has been removed from the base to pack flat.
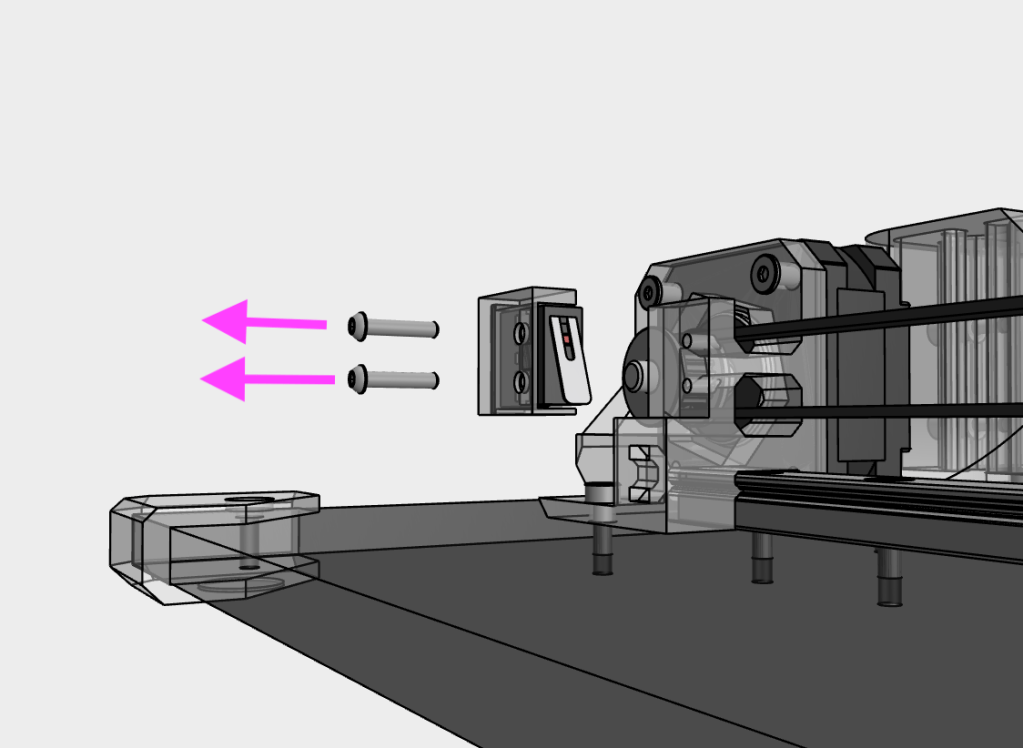
IMPORTANT: Before you begin, remove the Y microswitch from the Y motor mount by removing the two M2 screws on the side. This is because the cable is short and the connector can be damaged during the assembly process.
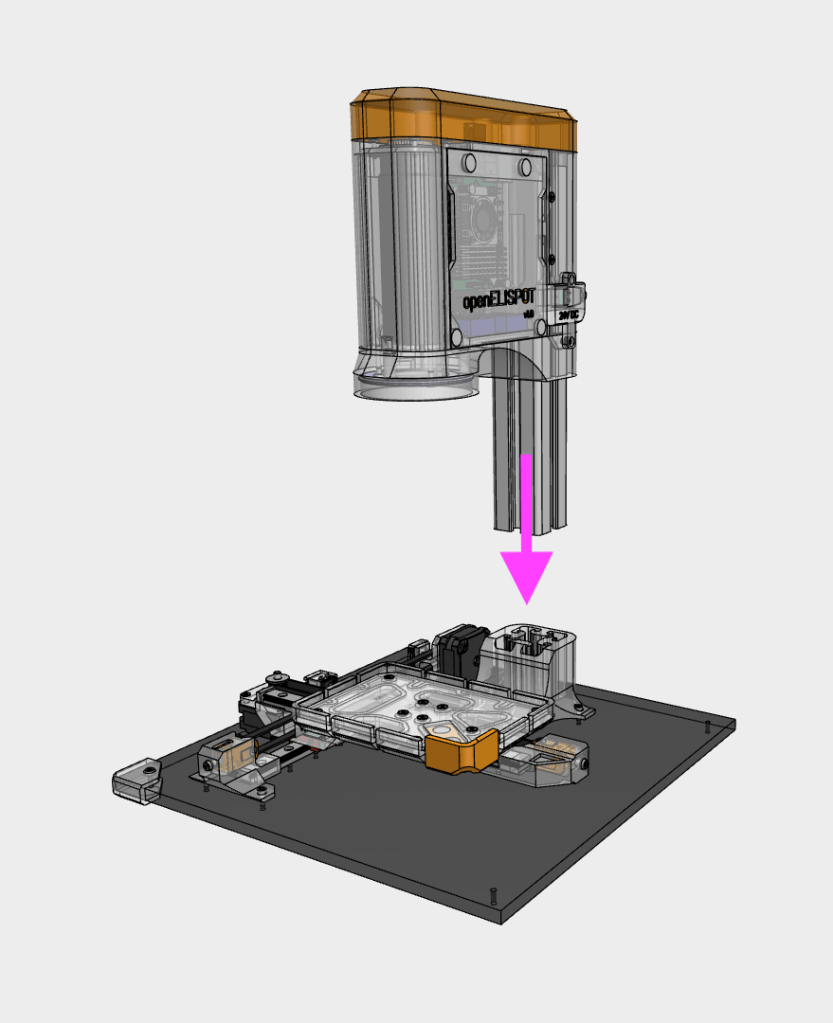
Insert the main unit into the base, ensuring that the aluminium extrusion goes all the way down to the bottom
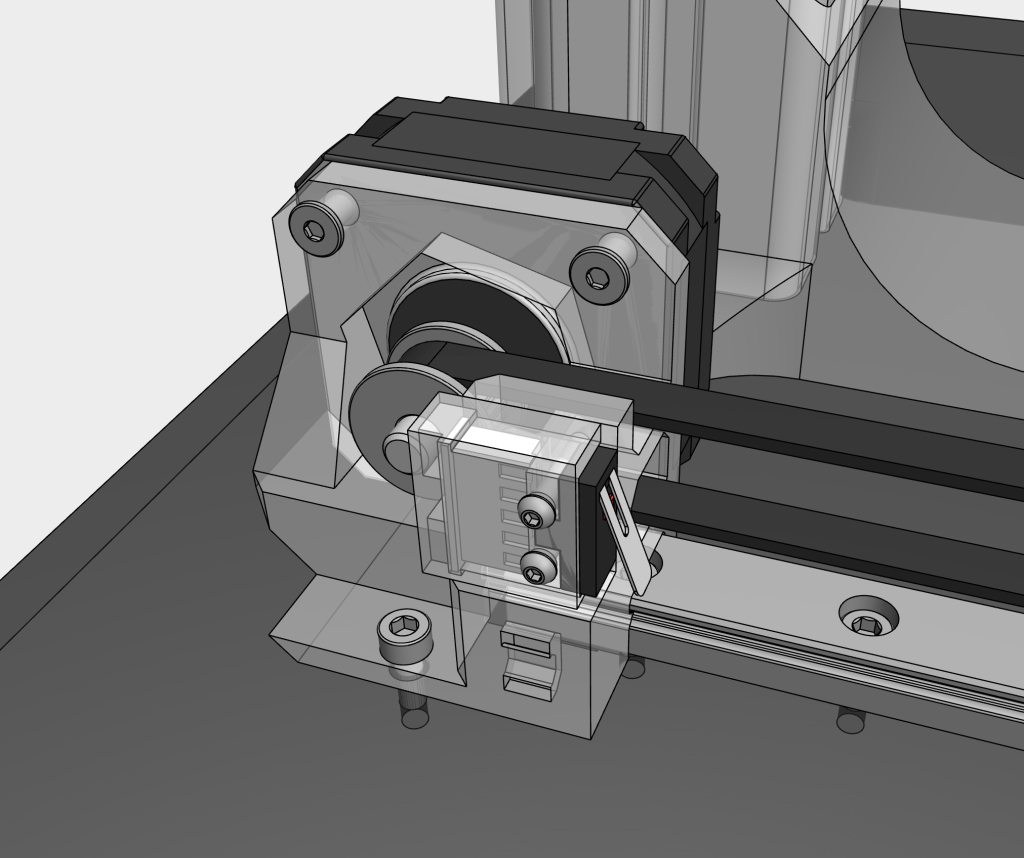
Re-attach the Y microswitch to the Y motor mount using two M2 screws. Double check the orientation of the microswitch
Check that the wires are all correctly in place, including the microswitch cables and motor cables
Manually move the plate holder along the X and Y axis, ensuring movement is smooth with no obstructions. You will feel a slight resistance from the motors, which is normal.
Plug in the power supply to the DC input on the right side of the main unit. openELISPOT will power on automatically when plugged into a power source
The first boot up may take a few minutes. openELISPOT will be ready to use once the ring LEDs have turned on
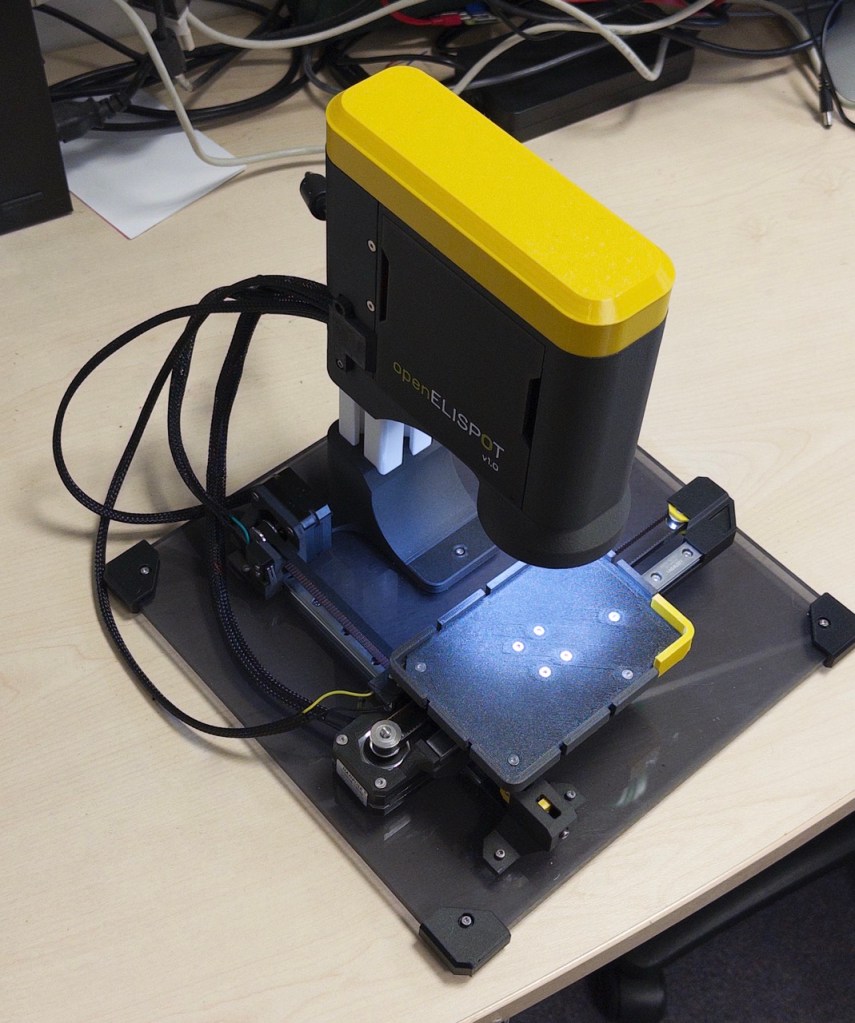
Getting to know your openELISPOT
Motion system
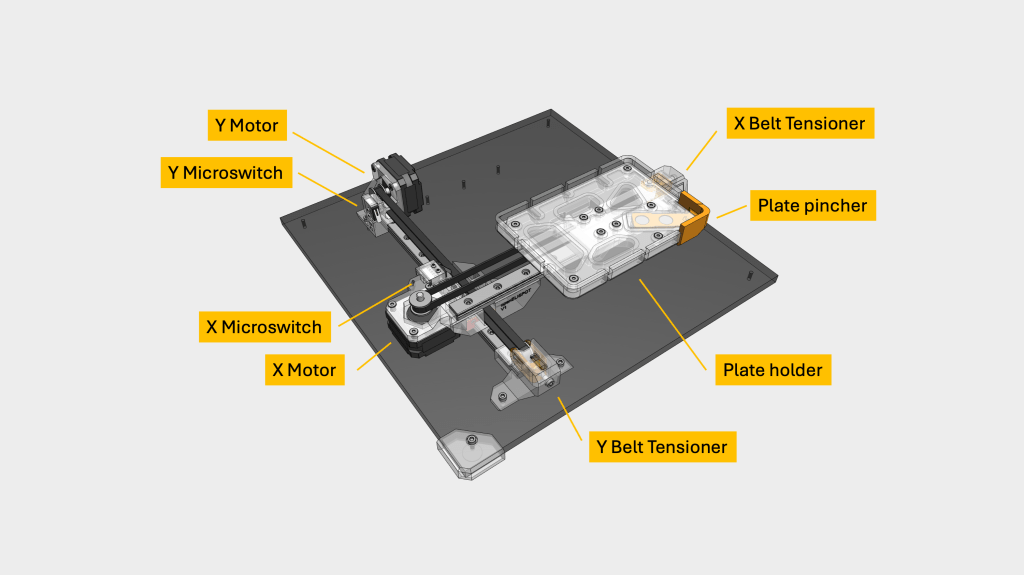
Main unit (right)
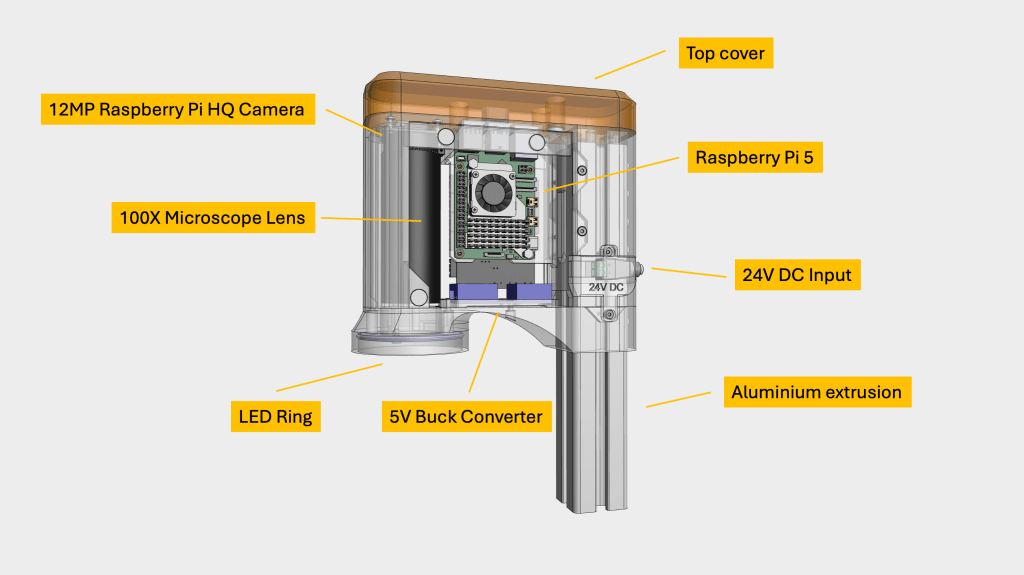
Main unit (left)
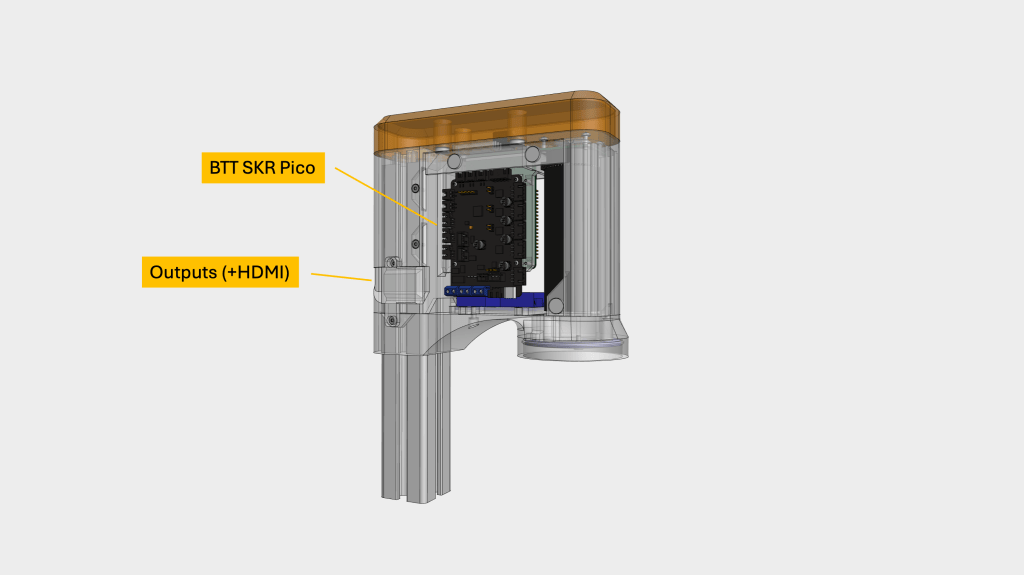
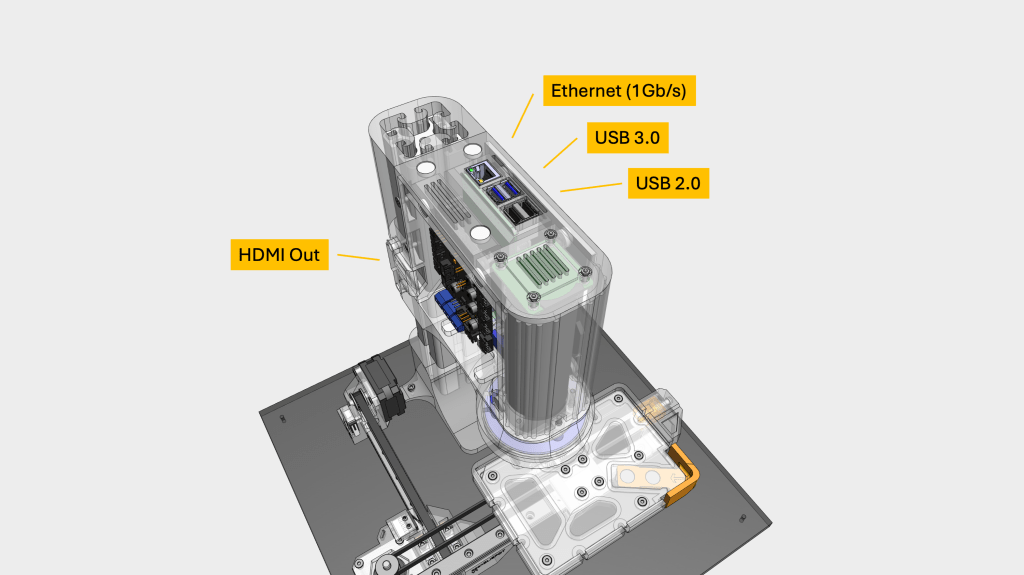
Main unit (ports)
Connecting to the openELISPOT
You can use the openELISPOT in two ways:
Option 1: Connect a monitor, mouse and keyboard directly to the openELISPOT (via the HDMI port on the left side, and USB ports on the top)
- We have provided a wireless keyboard/trackpad. To use this, insert 2X AA batteries into the keyboard and plug the USB unifying receiver into the top of the openELISPOT main unit. Alternatively, you can use your own USB keyboard and mouse.
- Once openELISPOT has booted up, you should see two shortcuts on the desktop. openELISPOT Dashboard and openELISPOT Analyse.
Option 2: Connect to the openELISPOT’s WiFi network, then access the openELISPOT dashboard from a browser on your computer or phone (we recommend using a computer for the larger display)
- Connect to the openELISPOT’s WiFi network (SSID: openELISPOT, password: openelispot)
- Open a browser window and go to: http://openelispot.local
- You should now see the openELISPOT dashboard
